A steam shower
is a must have luxury in modern bathrooms. Thermasol makes it easier for anyone
and everyone to make it all by ourselves. All we need is the resources and
time. There are few key points which we have to understand before we get into
the construction phase. There are three main stages which we have to take note
off. Designing - Buying the right resources - Safe and sound construction.
Let's begin with the design. First we must know the basic structure of a steam
shower. The heart of a steam shower is the steam generator.
Thermasol
provides us with the best variety of them. We can select one from Pro Series ,
AF Series or Steam Suite as per our requirement. These generators are placed
outside the steam shower. It is important that they are placed in an accessible
area with adequate ventilation. The selection of the steam generator depends on
the power we need and the distance from the Thermasol Steam generator to our
steam shower. This will help us deciding the best suitable location for the
steam generator and the best Thermasol steam generator for us.
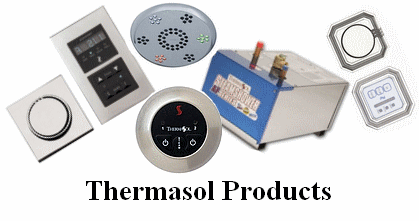
Next important part in design is the interior
of the shower. We are dealing with high moisture at high temperatures. Which
are the key factors in corrosion. So we must take adequate care in the
construction of the shower interior. A suggestion is that
we can use a water repellent coat in our walls and ceilings. A water repellent
coat or even water repellent tiling can do the trick for us. Next factor is to
make our shower water tight by providing rubber caskets underneath and above
the door. Providing a water shower is an at most necessity too.
Lets move on to
phase two. Acquiring the right resources. Once we determine the location of our
Thermasol steam generator and distance from the shower lets choose from one of
Thermasol's steam generator. When we are buying the tiles for floor,ceiling and
walls we must make sure they are water repellent. Any extra benches inside the
shower also must be constructed with water repellent materials. We can cut down
the coasts by replacing at least two of the walls with glass. The rubber
ceilings around the doors must be well fit that they will not let any steam
out. One point that we always remember is to make sure measurements are
pinpoint. Into the final phase of safe and sound construction. Install the
Thermasol steam generator in the adequately ventilated space. Make sure it is
fitted correctly as per the manual. Point out the spot to let the steam into
our steam shower. It can be on a spot lower than our Thermasol steam
generator's outlet. Seal all our walls , floor and ceilings with water
repellent tiles. Make sure our door is perfectly fit and water tight. One point
we must remember is to give a slope on our ceiling so that the steam will cool
down and run down through one side. The slope in the ceiling can be towards
either side as per our convenience but not towards the steam inlet. This is a
description which will be handy while constructing a steam shower by yourself.
For all the technical aspects make sure you will go through the manual provided
with each product you will be using while construction. Thermasol
products gives power into your hands to enhance your luxury.


